Introduction
Prolific is a company that helps researchers with finding participants. It is similar to CloudResearch functionality (see PsyToolkit lesson about CloudResearch).
It is super easy to use Prolific with PsyToolkit.
Step 1
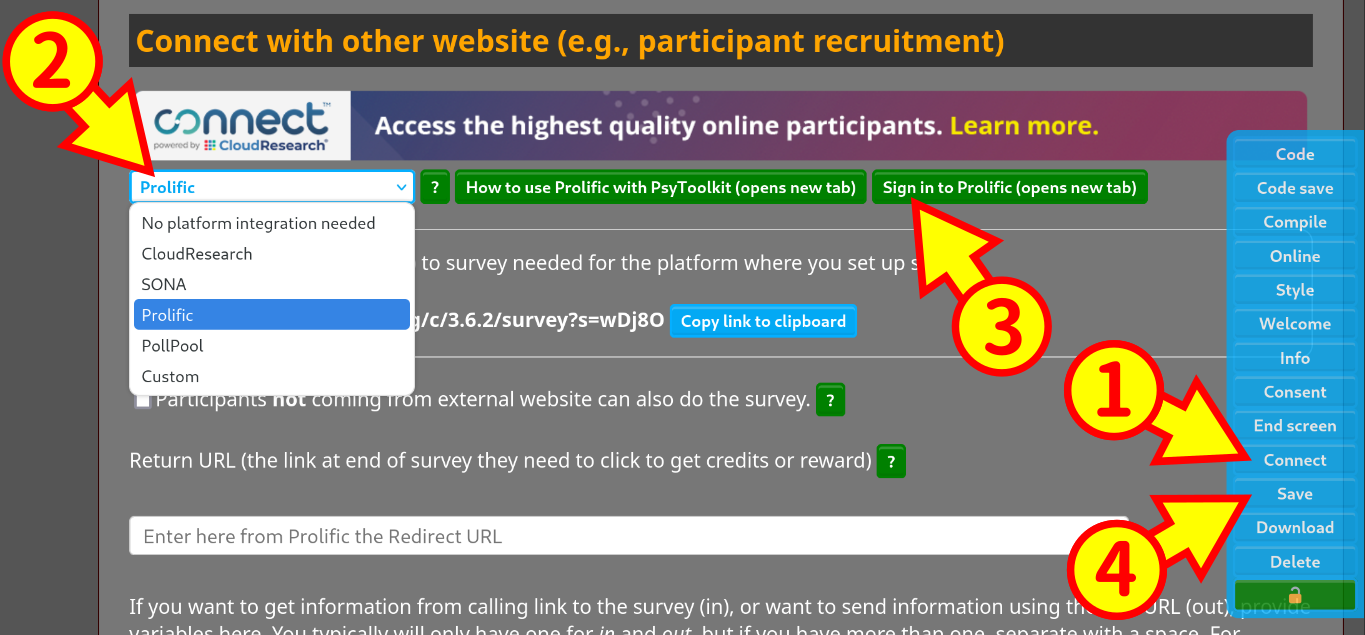
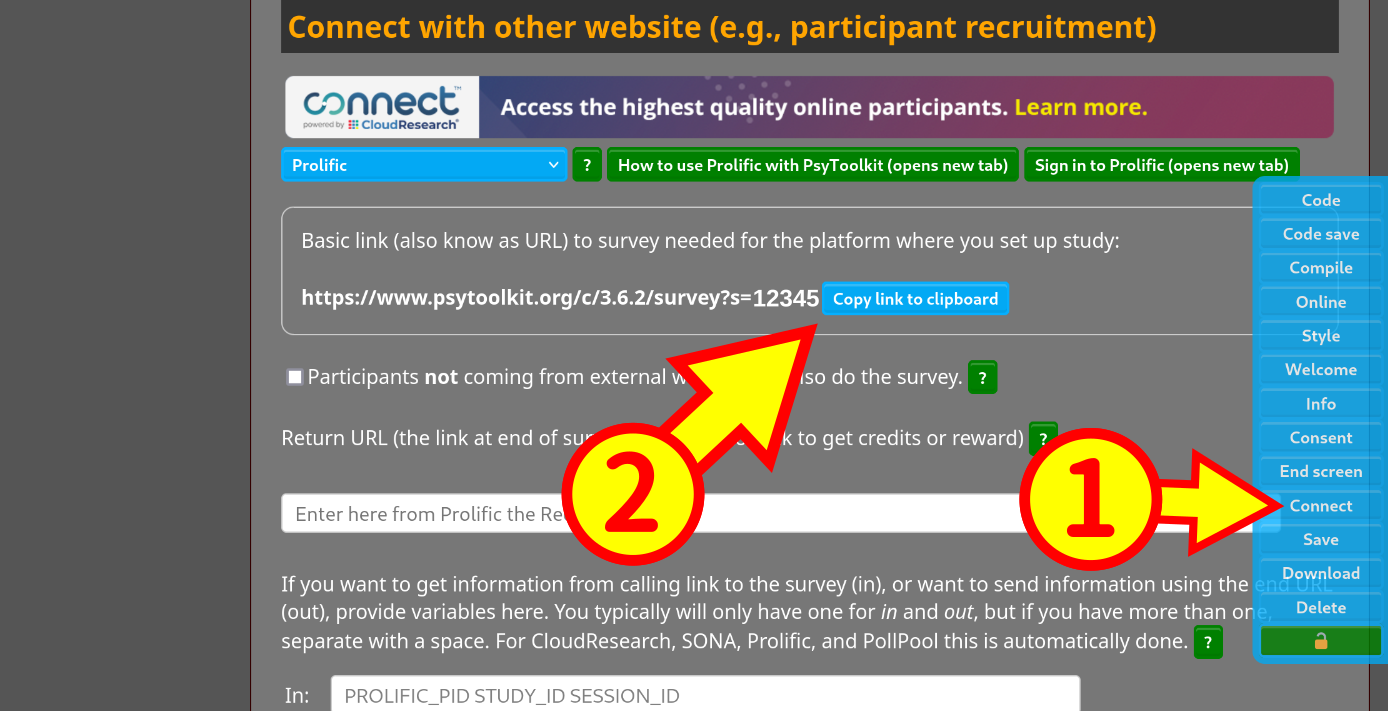
In PsyToolkit: Setup your survey in PsyToolkit as usual. In PsyToolkit, go to "Connect" (or scroll down to find this). In the image below, this is circled as 1 in the image below.
In that connect section, select "Prolific" from the dropdown menu. When you select that, you get a link Sign in to Prolific. This opens a new tab. You will swap regularly between the PsyToolkit and the Prolific Tab. It is only a matter of minutes to have it all set up, it is really easy.
| Make sure to select save after you have done this, that way PsyToolkit remembers this option. Whenever you edit your PsyToolkit survey and the background becomes reddish/brown, it means you need to save your data. In the rest of this tutorial, I won’t mention the save again, but don’t forget it yourself. It is fairly obvious when you need to save, just check the background color. |
Step 2
In Prolific: Make sure you have a Prolific researcher account. Login to that.
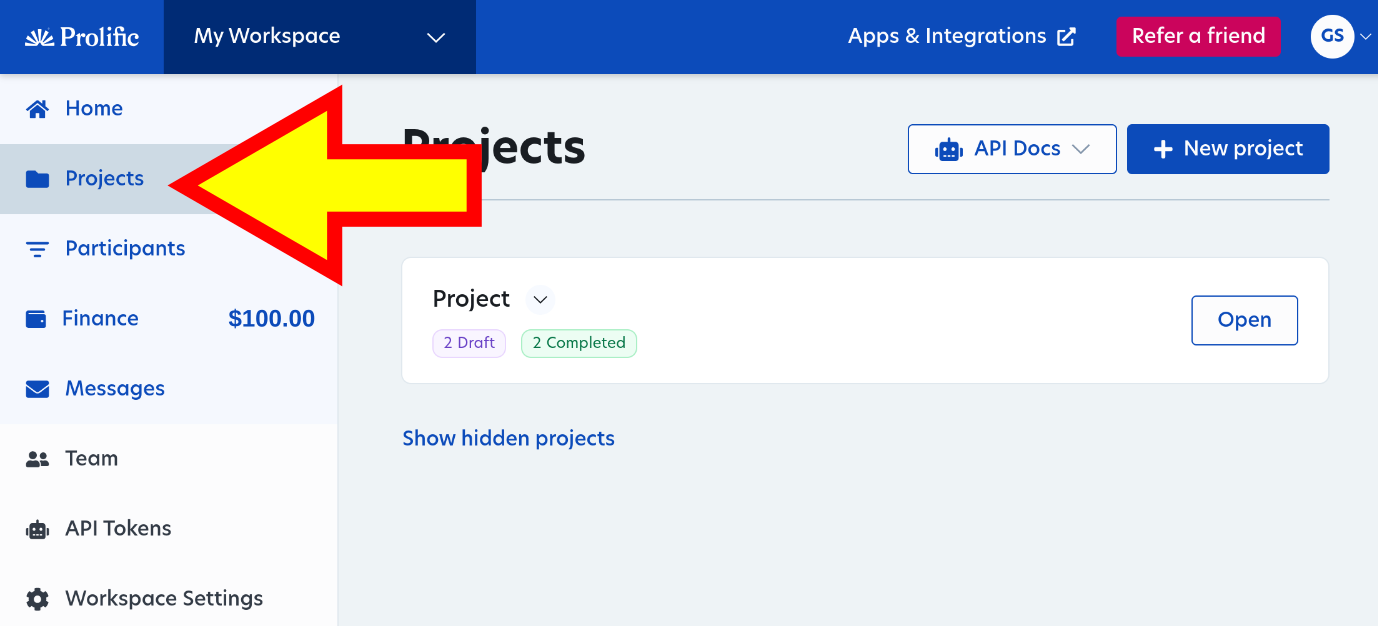
Select "Projects" in the top left of the Prolific website
Step 3
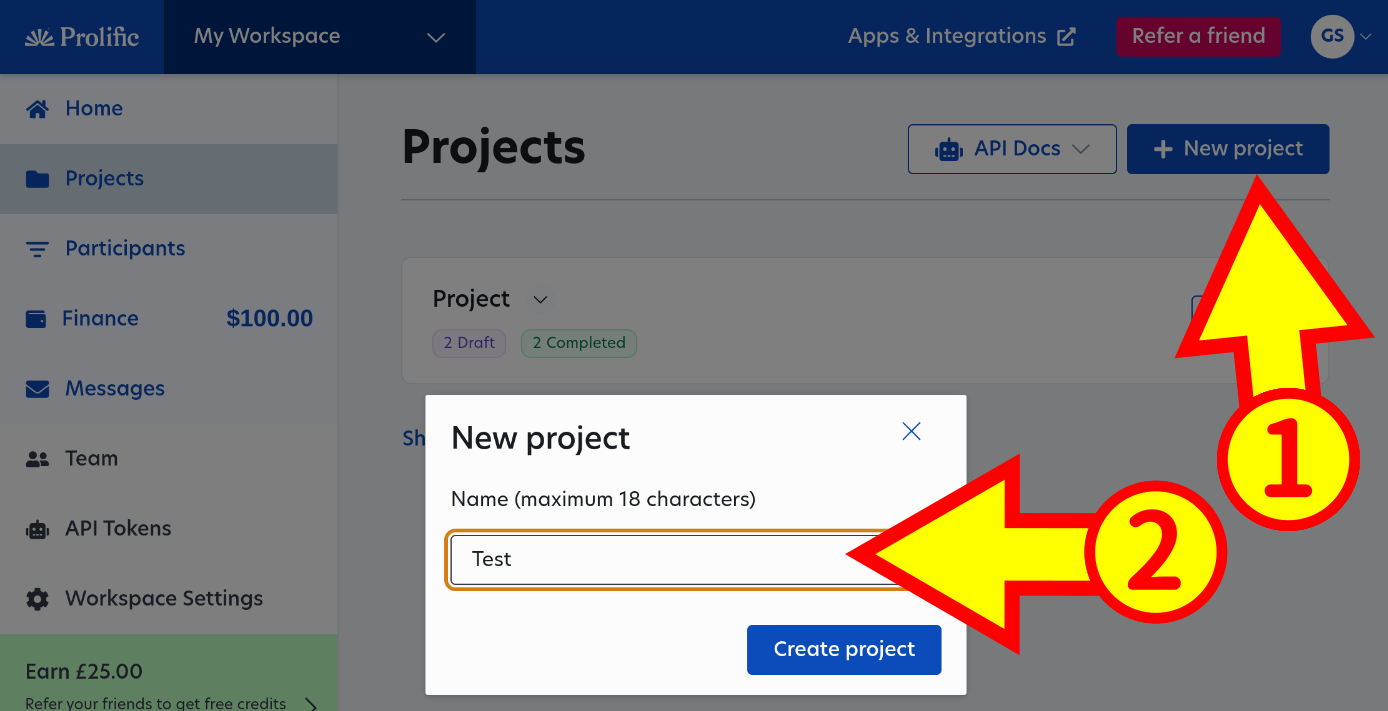
In Prolific: Create a new project or if you already have projects, open a project. Give the project a name.
Step 4
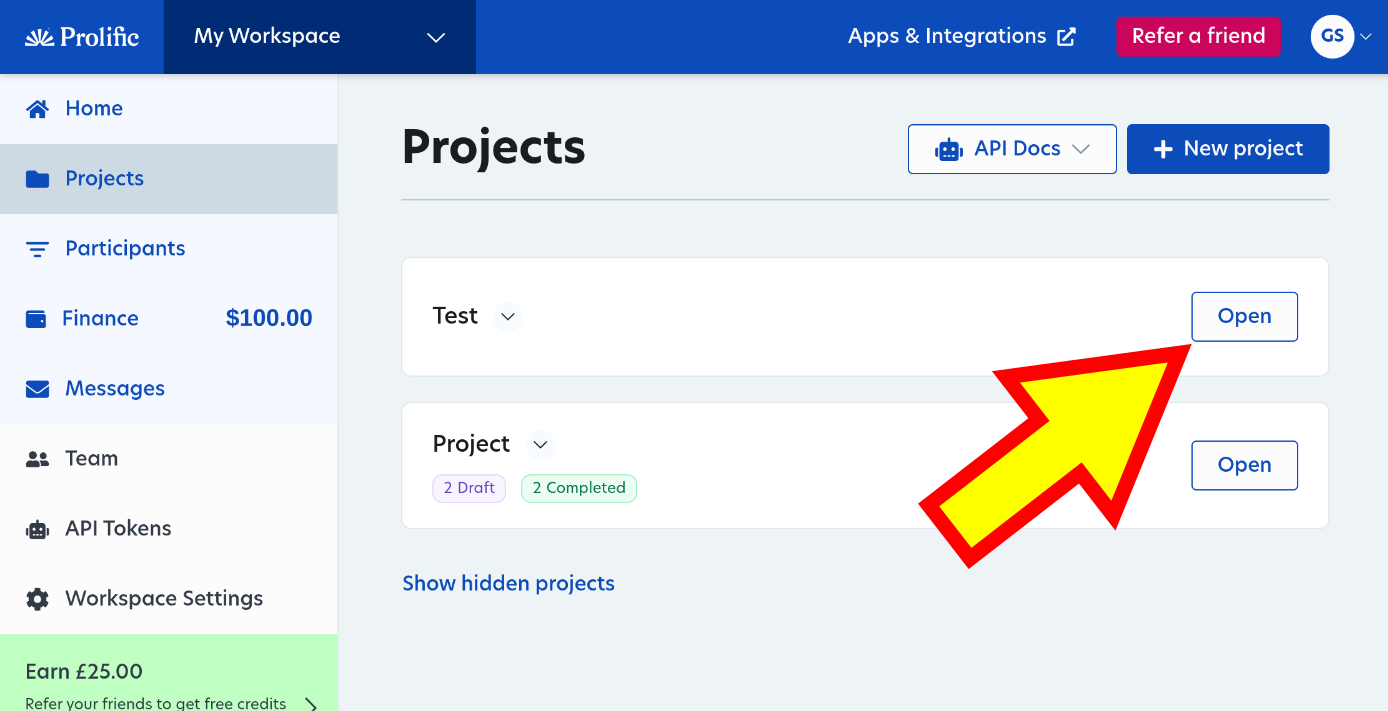
In Prolific: Now open that project
Step 5
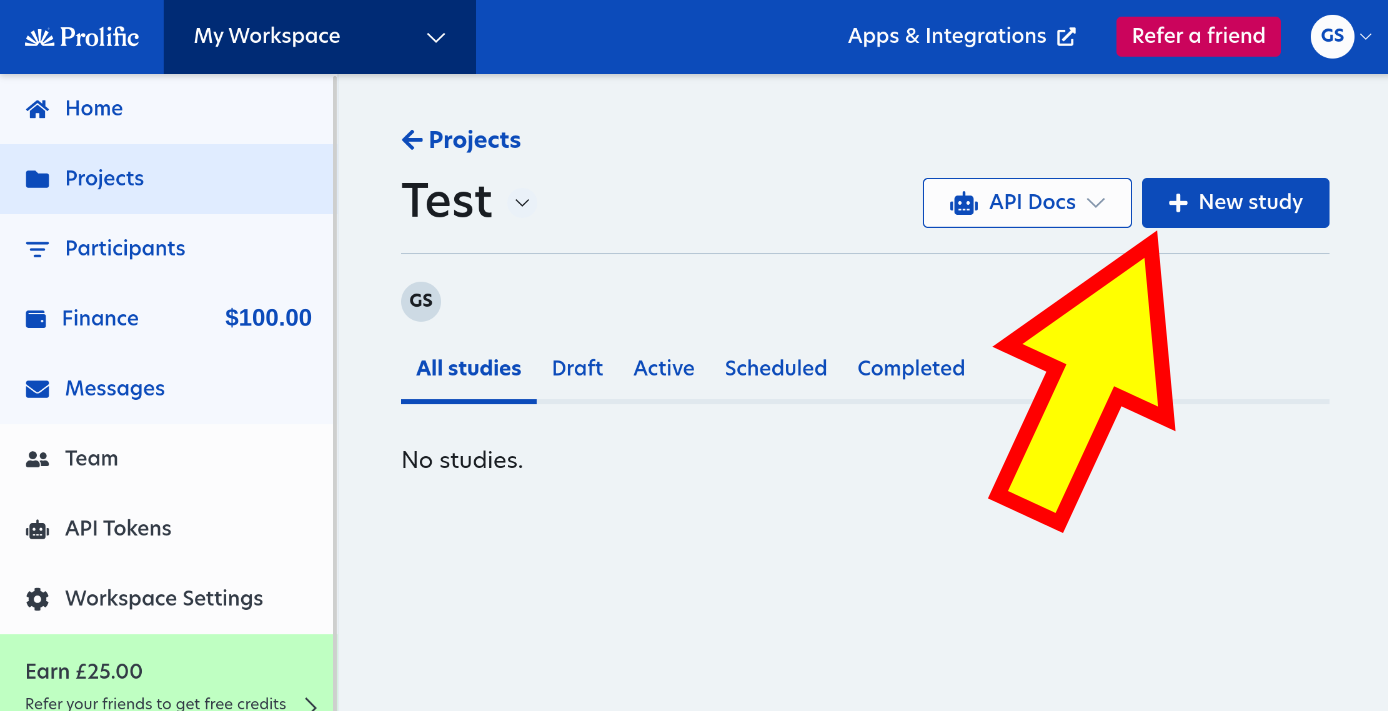
In Prolific: In your just opened project, create a New study
Step 6
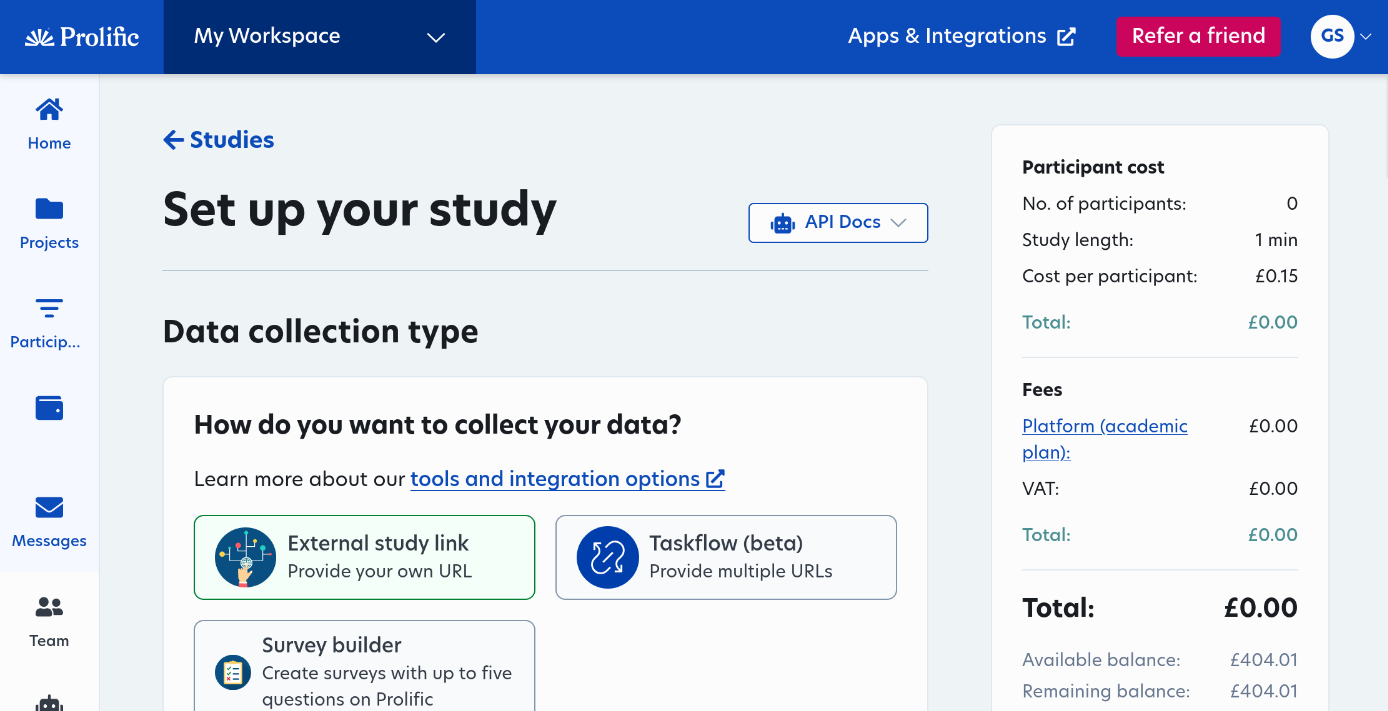
In Prolific: Now you are in your new study. All sorts of things to fill in, such as the name of the study. You can fill in anything you want here.
Step 7
In PsyToolkit In your PsyToolkit survey setup, you need to go the section "Connect"
There you click on the button "Copy link to clipboard"
Step 8
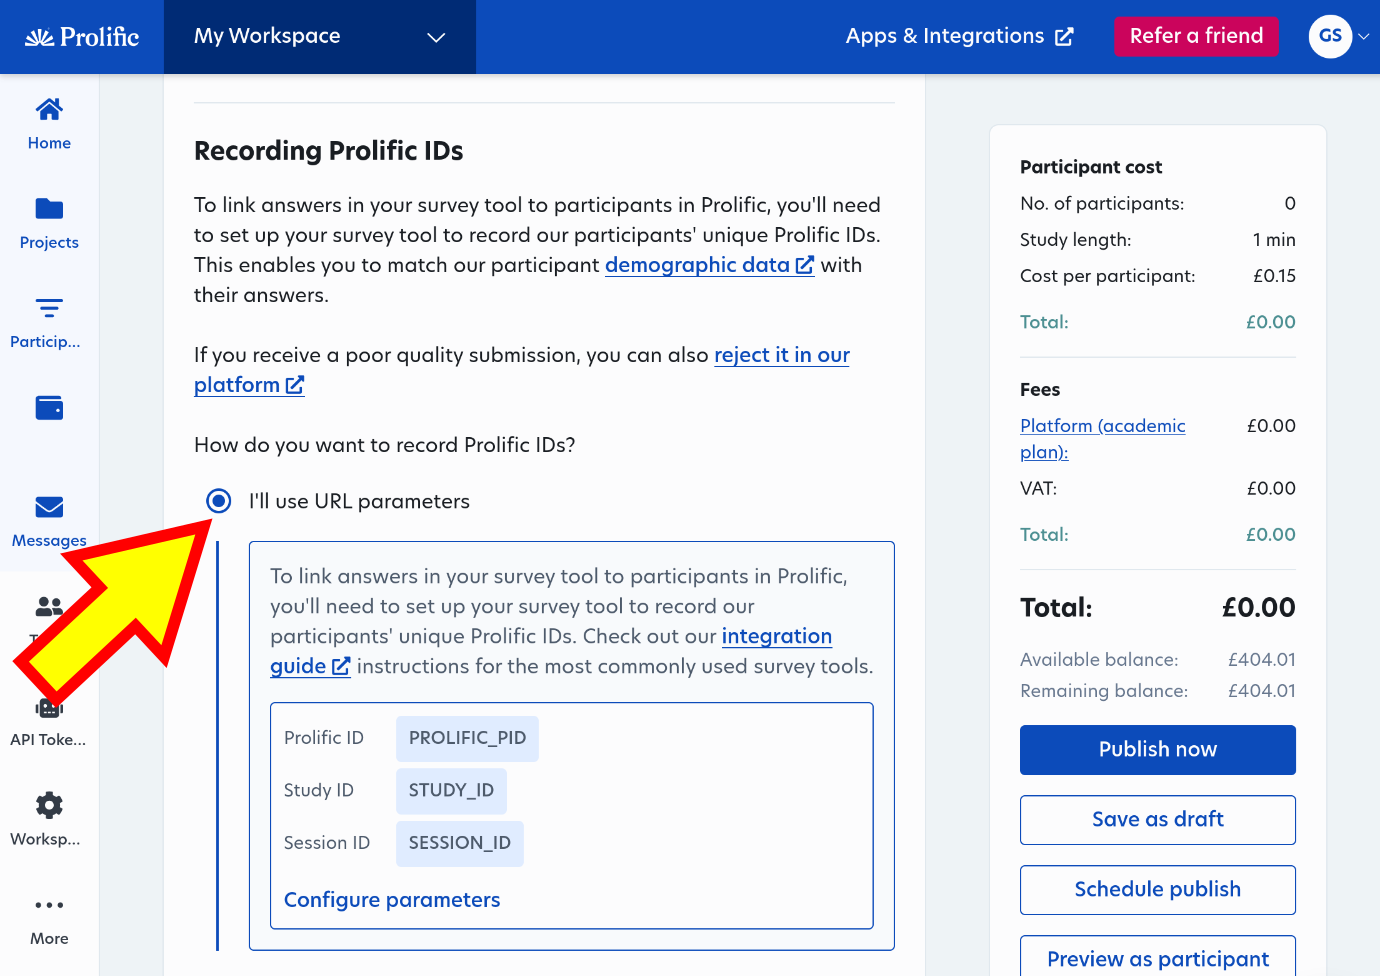
In Prolific: Back to your Prolific page. Now select the option I’ll use parameters. This is technical, but you just leave it as it is, you do not need to worry about this. Prolific and PsyToolkit handle this automatically for you.
Step 9
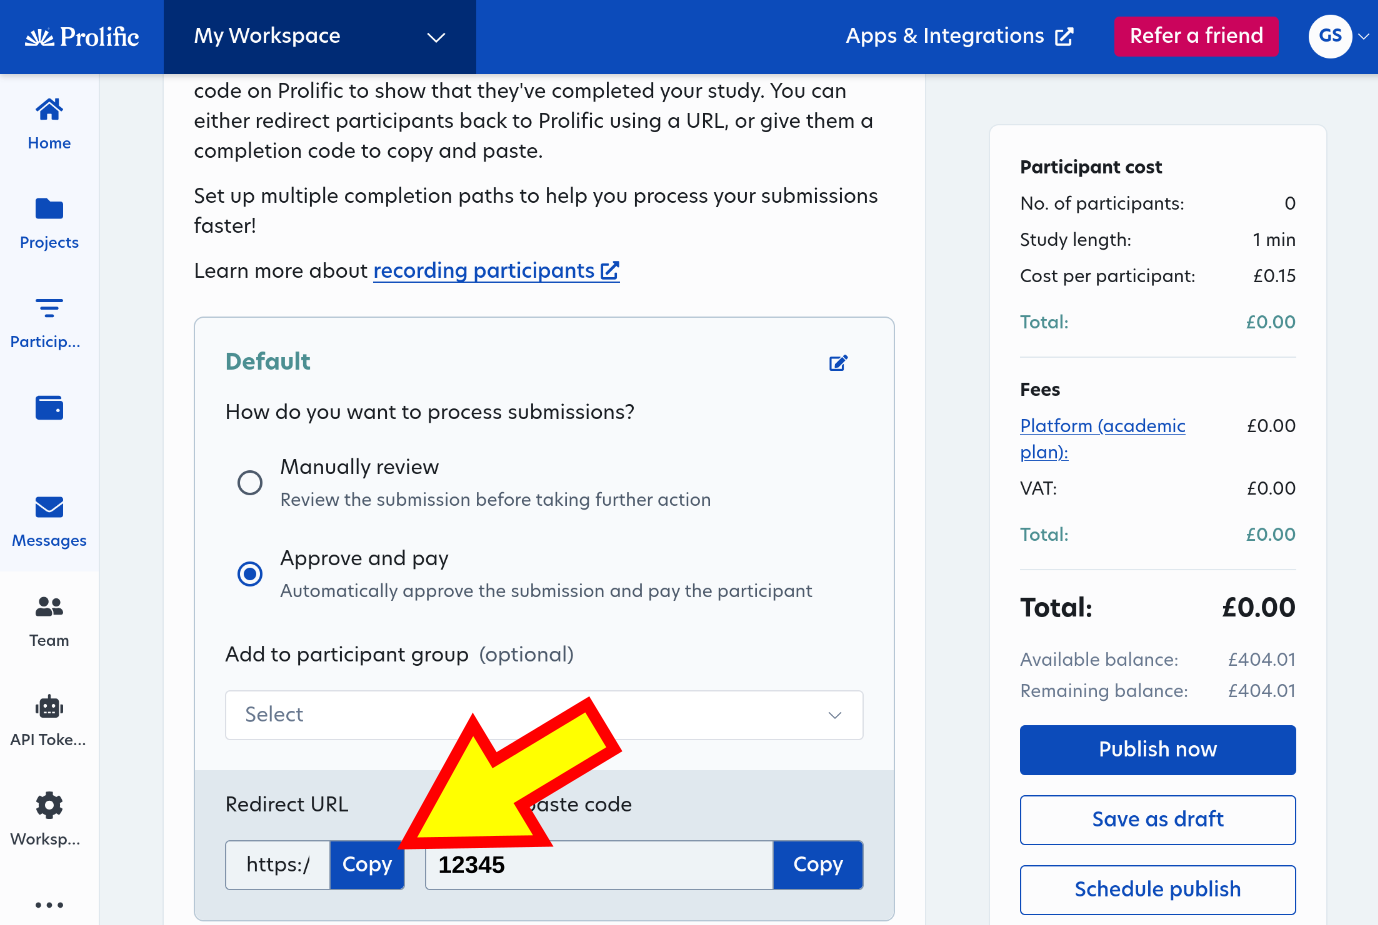
In Prolific: Scroll down further until you see this. The Redirect URL is what you need. Click on the Copy button.
Step 10
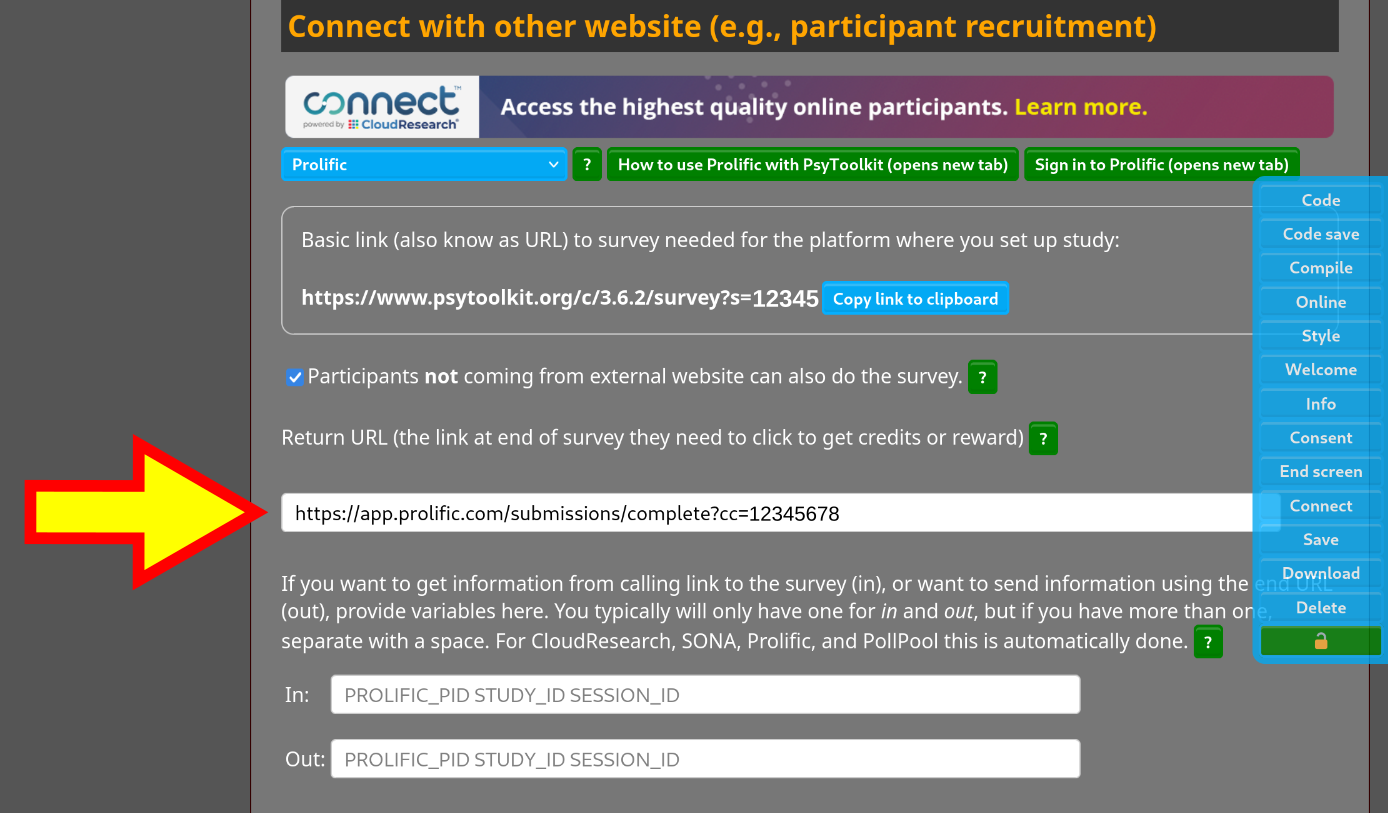
In PsyToolkit Now paste this in your connect section in PsyToolkit and then select save to save your survey information.
Step 11
In PsyToolkit Compile your survey again. This makes sure all the new information you added will be used the next time the survey runs.
Step 12
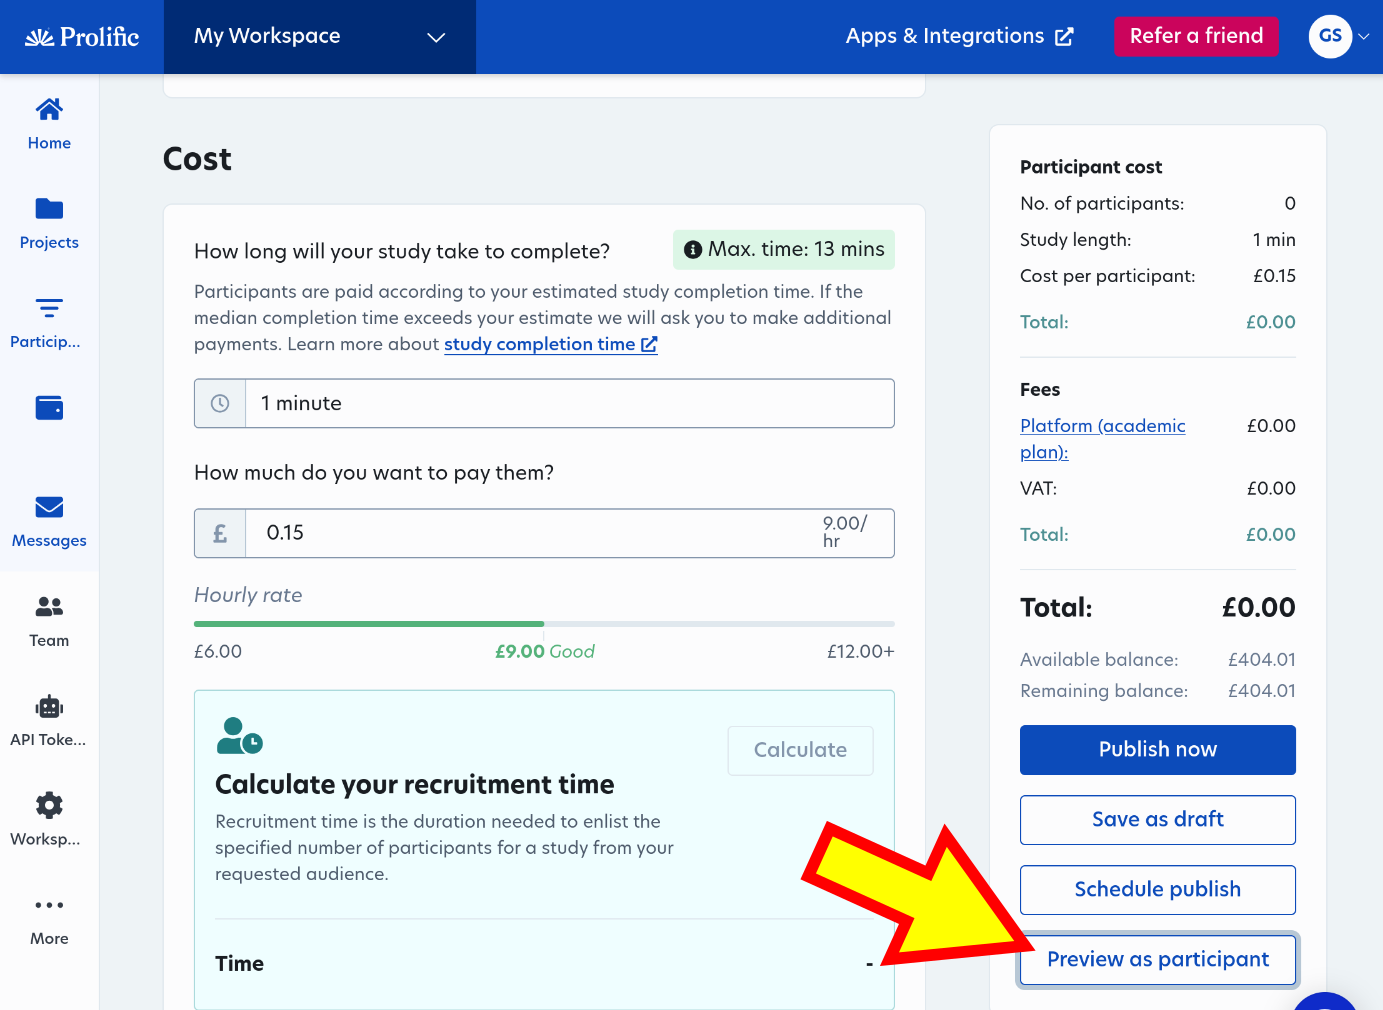
In Prolific Scroll further down and and click "Preview as participant"
Step 13
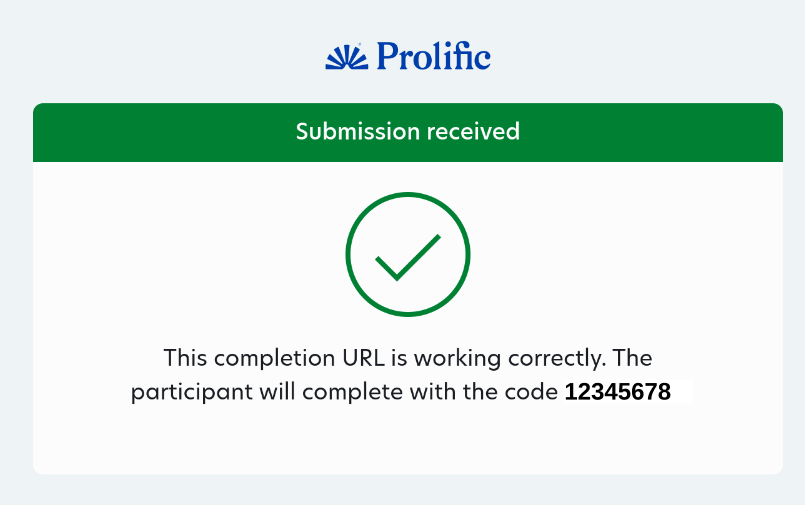
If your it all worked well, you get a Prolific test confirmation. Now you are ready to go.
Step 14
In PsyToolkit
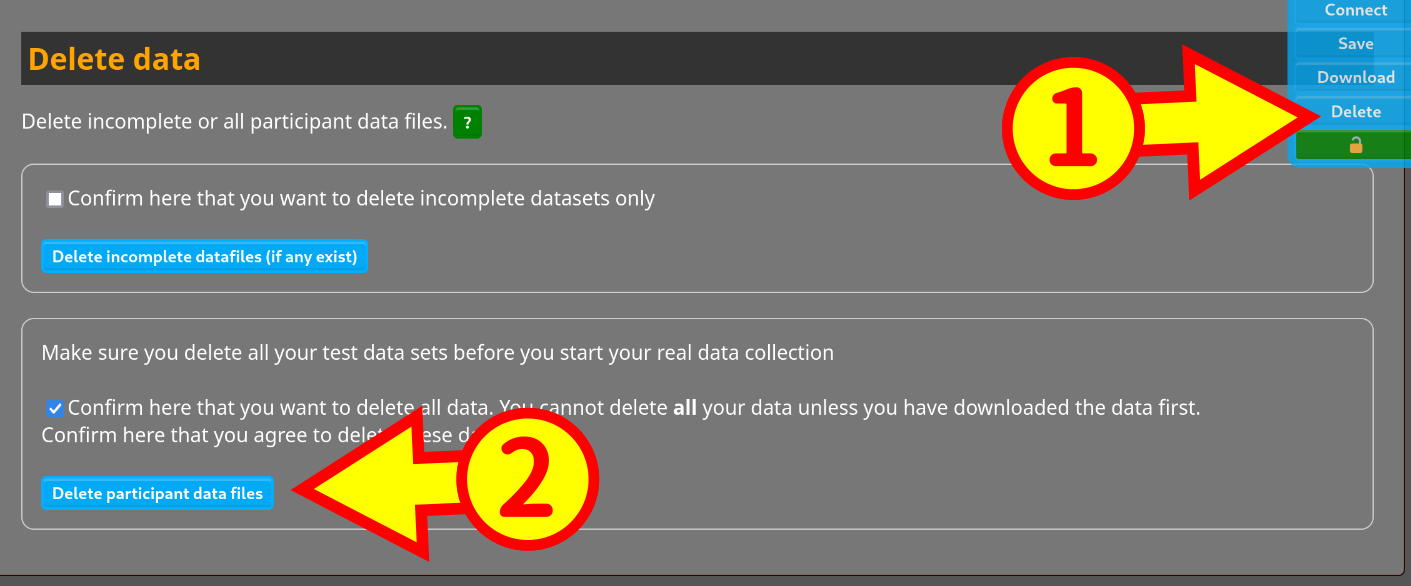
Note, though, that in testing you also created one PsyToolkit data files, so you can remove this before you really start. To do this, you need to take a couple of steps in PsyToolkit, namely:
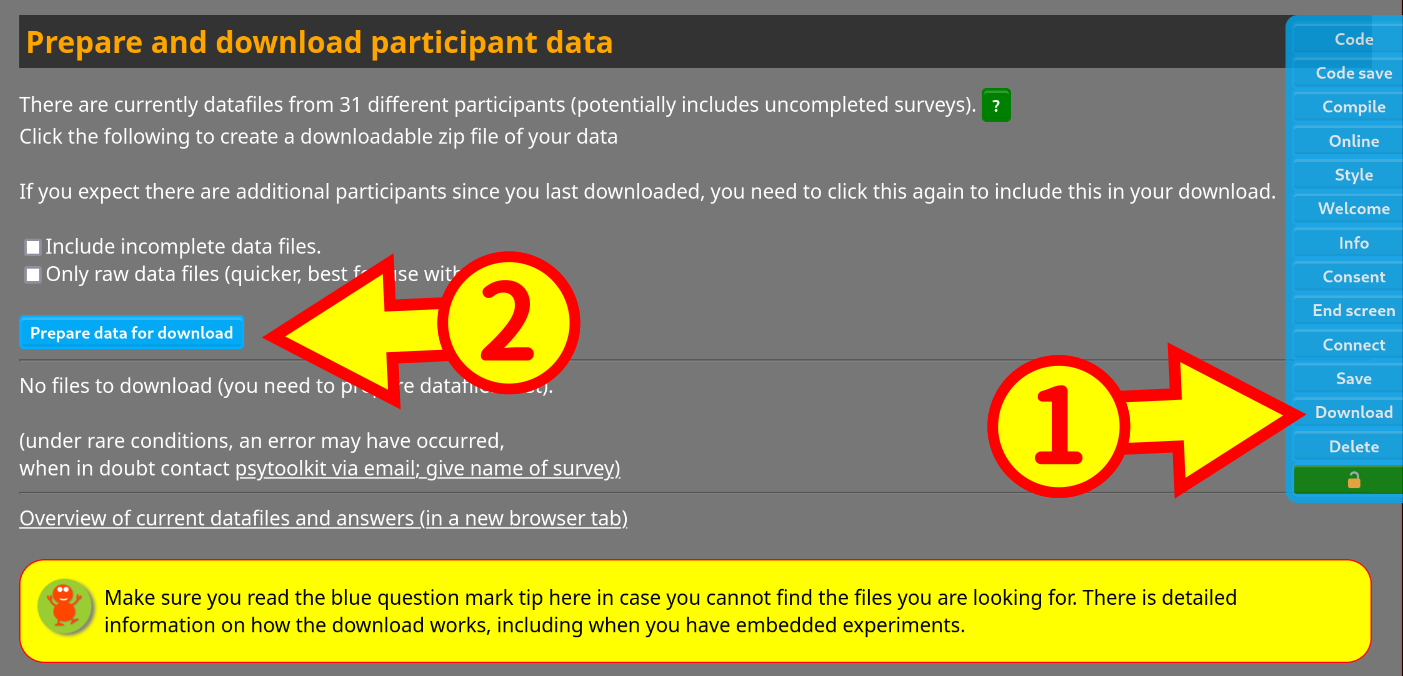
Prepare your data for download
In PsyToolkit, before you can download your data, you need to preprocess it. This is done on the server and takes a bit of time, you will get a message about that.
Download the data
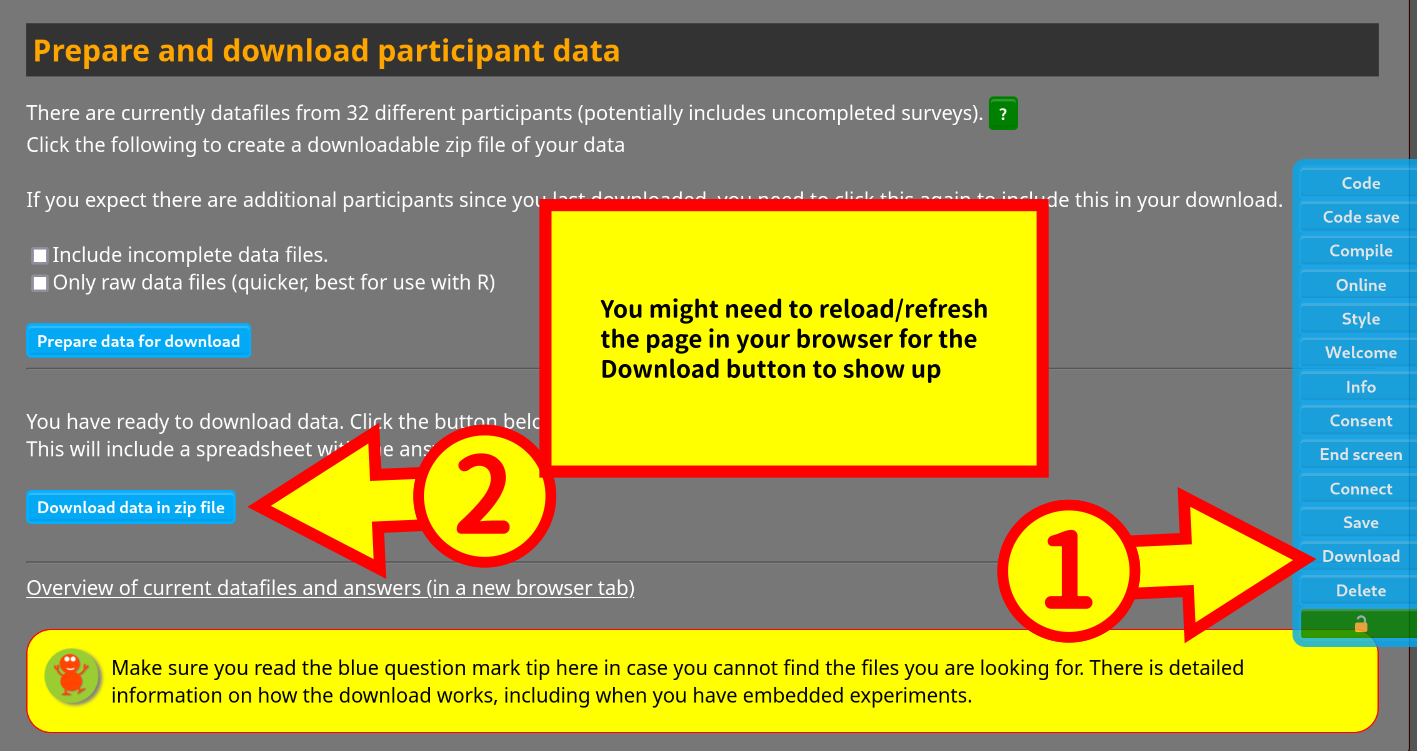
Download the data to your own computer (even though you do not really need these these data). If you do not see a Download button (which happens if you do this for the first time), you need to refresh the page. Just press control-R on your browser or press the reload page button in case needed.
Delete the data
And finally, delete the data. The reason why there are many steps is to ensure it is practically impossible to delete your valuable data erroneously.
